Science in the Kitchen ~ Easy Experiments for Kids
By Jonathan Winter
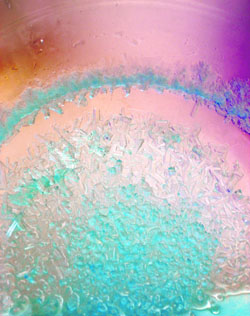
Epson salt mixed with very hot water and food coloring forms crystals Photos Jennifer Wake
When you think of crystals, do you think of diamonds, emeralds and Indiana Jones? Did you know that we use crystals every day in the kitchen? Two kinds that you eat regularly are salt and sugar. Crystals, after all, are simply a regular pattern of atoms or molecules. If you have a strong magnifier or microscope at home you can see the regular shapes of sugar and salt.
Here are two recipes for building real crystals. The first one makes fast crystals, the second takes longer, but you can eat the second kind when they're done!
1. Gather these supplies for quick crystals:
Epsom Salts
(available at the drugstore)
Food coloring (optional)
Measuring cup
A clean jar
A spoon
Hot water from the sink
2. Start your experiment:
Get the hottest water you can from your sink. It doesn't have to be boiling. Measure out 1/2 cup of the hot water into the jar. Slowly stir in 1/2 cup of Epsom salts. Stir constantly so they dissolve as much as possible. Add two drops of food coloring if you wish. Now set the jar in the back of your refrigerator for at least three hours without disturbing it.
3. What happened?
When you dissolved the Epsom salts, they broke into smaller parts called ions. As the solution cooled, the ions bonded again, hooking onto each other into long delicate needle shapes. Reminder: Don't eat these crystals! They wouldn't hurt you, but they won't taste good!
4. Gather these supplies for
edible crystals:
Sugar
Water
Food Coloring (optional)
Stovetop and Pan
Clean Jar or Glass
A few inches of cotton string
A spoon
A pencil or stick
Paper towel or napkin
Start your second experiment:
With adult help, heat 1 cup of water until it boils. Turn the heat off and slowly stir in three cups of sugar, stirring constantly until all of the sugar is dissolved. Add two drops of food coloring if you wish. Carefully pour the solution into the clean glass. Tie the string onto the pencil and dip the string into the solution (The string should not touch the bottom of the jar). Now roll the string in some sugar and set it aside. When the solution is completely cool, gently lower the sugar-coated string into the solution, suspending it over the top of the glass with the pencil or stick. Try not to knock off any of the sugar on the string. Set the jar on a windowsill or another safe place where it won't be disturbed. Put a small piece of paper towel over the top of the jar to keep dust out. You will have to wait up to three weeks for crystals to form on the string. The longer you wait, the bigger the crystals will get. If crystals start to form on the bottom of the jar, transfer the solution and string to another clean jar.
What happened?
The sugar on the string acted as a seed crystal, a place for the other crystals to attach to. Over time as the water evaporated, the sugar was left behind. You just made rock candy!
Jonathan Winter has been a science teacher at Lafayette Elementary School in Lafayette since 2001. He lives in Moraga with his wife, children, numerous pets - and he experiments frequently in his kitchen.