| | Published December 6th, 2023
| Patching holes made easy
| | | By Jim Hurley | 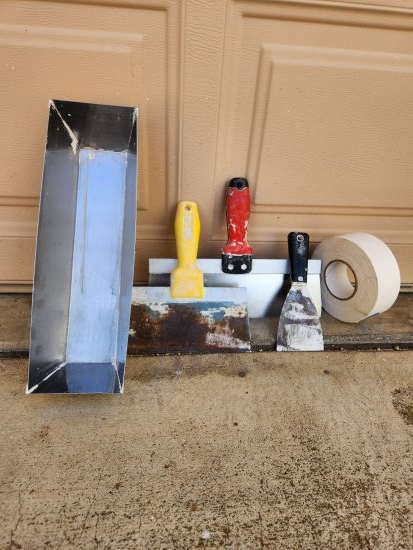 | | Photo Jim Hurley |
Do you have a hole from a nail or screw in the wall? You can spackle it or just leave it alone. Did the doorknob bang the wall and make a dent? You could fill the dent or ignore it. Did the doorknob punch through the wall leaving a hole the size of your fist or larger? That requires a patch. The question is: Who will patch it and how?
 Patching holes in walls is a very easy DIY if you don't care what that wall looks like after it is patched. Out in your garage, behind the refrigerator or bookcase, inside a closet, the finished surface or texture on the surface really does not matter because no one will ever see it. However, finishing a patch to match the texture of the wall where you will see it, well, that takes time and technique.
The hardware store does have wall patching kits. I don't recommend them. The kit includes a sticky fiberglass mesh that adheres over the hole and is then covered with joint compound, AKA "mud." What the easy-to-follow instructions don't tell you is that you will see that raised 1/16-inch bump on the wall. To get rid of that bump, professionals do what is called "feathering," spreading more texture over a wider radius from the lump until it looks flat. Being generous with the mud is a good thing.
Instead of a patching kit, I square off the hole by cutting out the surrounding sheetrock and nail in a replacement piece. Then I tape the seams, (with paper joint tape, not masking tape) and texture the area to make it match the rest of the wall. This involves a little more time than the fiberglass patch but gives better-looking results. The key to doing this yourself will be understanding how to match that texture.
What is the texture you are going to match? First off, let me say that "Smooth" is a texture. I recently did a shed-to-home-office conversion with new sheetrock on the walls. I asked the client what texture they wanted, and they said, "no texture." I had to explain that smooth is a texture. Smooth walls are one of the more time-consuming finishes to achieve. Why is that? It takes several passes over the area alternating light sanding with applying mud, (joint compound) and allowing time in between for the mud to dry.
Other textures consist of thinned mud sprayed from a hopper by an air compressor and lightly troweled for a decorative, lumpy surface. The lumpy styles of textures, commonly called "Knock Down" and "Orange Peel," are very good for hiding slight bumps and irregularities in the surface of the wall. The third most common texture, after Orange Peel and Knock Down, is Skip Drag. Skip drag texturing is easy to learn, and is common in homes from the '60s and '70s. With skip drag, you thin the mud with water, put the mixture in your mud-pan, coat your blade with a thin line of mud on the long edge and gently drag it across the wall allowing the blade to randomly skip and leave blotches of mud and gaps.
If you are attempting to match a Knock Down or Orange Peel style, you can buy cans of spray-on texture in the paint department at the big box store. My experience with this stuff has not been positive. The cans cost plenty and frequently clog before they are empty. I called customer service for the manufacturer about the clogged cans. They recommend warming the can in hot water before use to loosen the contents for mixing. Humph, I recommend not spending money on products that don't work. You can match that texture with a sponge. Mix your mud with water to thin it and dab it on the wall with a big sponge or a sponge roller. Let it dry about 15 to 20 minutes and knock it down gently with your trowel. Extend the new texturing over the patched area and beyond, to blend the patch in with the rest of the surface.
The good news about using mud is that it cleans up with water. Let splotches that hit the floor dry and then pop them off with a putty knife. It's all washable. Just remember that once the wall is finished, the bare mud must be primed and painted to seal the mud to the wall. See my article about touch-up paint for this next step.
Patching larger holes in your wall or ceiling is very involved, requiring tools and techniques to accomplish. Watching several YouTube How-To videos might help you get the result you want. Or, you might save time and frustration by hiring a painter or a handyman to take care of the problem for you. |
 | | Jim Hurley is an independent handyman with over 25 years of experience in residential repairs. Hopefully this free advice is helpful to someone attempting Do-It-Yourself home repairs. The information presented is intended for informational purposes and for use by persons having appropriate technical skill, at their own discretion and risk. | | | | | | | | | | | |